With Windows 365, Microsoft provides a fully managed Virtual Desktop Infrastructure (VDI) environment, all based on licensing. But how can you make sure that you buy the right license and know when and how to resize your Cloud PCs to match changing user needs?
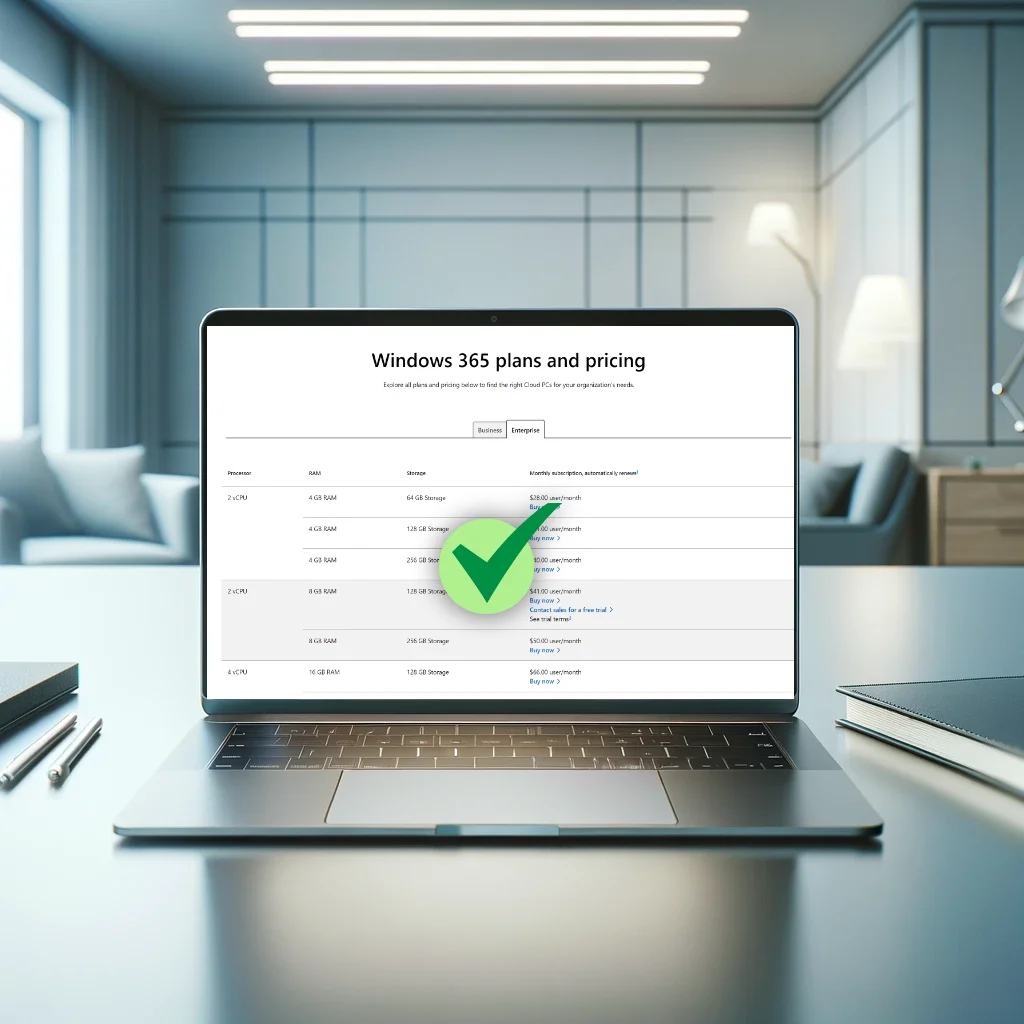
Windows 365 offers multiple SKUs, starting from a 2 CPU, 4GB of RAM and 64 GB of storage, all the way up to 16 CPU, 64GB of RAM and 1TB of storage. I’m sure this list will be expanded in the future as well and Windows 365 will offer even more flexibility. Don’t forget it’s also easy to combine multiple licenses, so you are not limited to a single set of specifications. If you are looking for license optimalization, if your use case allows it, you can opt for the frontline license which is more targeted towards shift workers, but you can provide 3 Cloud PCs on 1 single license, more info on Enterprise vs Frontline can be found on my very first blogpost as well.
Most companies typically tend to start with the 2 CPU, 8GB RAM, and 128GB storage option, the so-called “Hero SKU”. While these specifications may seem modest, it’s important to remember that Windows 365 runs on server hardware, which gives a completely different user experience in comparison to a traditional consumer laptop.
This 2 CPU, 8GB RAM, and 128GB of storage SKU is suitable for most use cases. However, if you are not sure, you can contact your partner to request trial licenses. This allows you to evaluate whether the selected SKU meets your needs before committing to a purchase.
How to deal with multiple SKUs
An effective way to manage multiple SKUs, especially for Enterprise SKUs, is to use different Entra ID groups, assigning a license to each group. When dealing with frontline SKUs, you can apply the same strategy, but instead of assigning the license at the group level, you assign it during the assignment within the provisioning policy.
For finance users this could look like this:

When a new finance user needs access to a Cloud PC, simply add the user to the dedicated group to have a cloud PC provisioned for them. This approach also clearly differentiates between the various SKUs and identifies the department to which the user is being assigned.
Remember to assign the created groups with their respective licenses to a provisioning policy.

Review Cloud PC performance
Now that we’ve covered how to work with different SKUs, let’s evaluate the performance and utilization of the Cloud PCs.
Microsoft provides a nice and comprehensive report that easily shows how well a Cloud PC is being used. If the usage meets the usage thresholds, the report indicates whether the SKU is suitable for the users’ specific needs. No configuration required.
You can simply access this report from within the reports section of Intune and by navigating to the Cloud PC overview section.

From here, you can access both the Utilization report and the Recommendations report.
Cloud PC utilization
The Utilization report provides a clear overview of Cloud PC usage, detailing which PCs have been used and to what extent. You can customize the report by adding or removing columns using the columns button. Additionally, this report can be easily exported to a CSV file.
If you are familiar with Graph, you can write a script to remove licenses from users who are not utilizing their Cloud PCs, making these licenses available for others.

Cloud PC recommendations
The Recommendations report is even more interesting, as it uses statistics to identify which Cloud PCs are offering enough performance based on users their needs. Unlike regular PCs, where solving performance issues requires providing a new, or upgrading the existing device, which is a time-consuming and tedious task. Cloud PCs allow you to resize the virtual endpoint on the fly. However, resizing does interrupt the users’ session, so it is recommended to perform these actions during maintenance windows, which I covered in one of my previous blogs.
When you are testing your Cloud PCs during a trial or a proof of concept and if you want to make sure that your chosen SKU is powerful enough, make sure to use the Cloud PCs on a day to day basis. Failing to do so will result in the Cloud PC being underutilized, thus not providing the required insights that you are looking for.

In addition to individual Cloud PC overviews, you can also access an overview per SKU to gain a general understanding of the performance for each chosen size.

Resizing an existing Cloud PC
If you deem your Cloud PC overpowered, or not powerful enough, you can always and easily resize them. Because Windows 365 works with a license model it’s a little different that you are used to with for example Azure Virtual Desktop.
Microsoft is providing a flowchart with the steps you should follow to resize an existing Cloud PC, it highlights all possible outcomes of resizing when working with multiple groups, provisioning policies and SKUs. It’s recommended to review this carefully before proceeding with the resize.
Resizing a Cloud PC is supported on:
- Windows 365 Enterprise
- Windows 365 Frontline Dedicated
If you are looking to resize a Frontline Shared provisioning policy it’s better to recreate the Cloud PCs as they are all configured automatically by Device Preparation Policies.
The resize flowchart:

Conclusion
Choosing the right license for your Cloud PCs is important but can be difficult, with the 2 CPU, 8GB RAM, and 128GB storage being a common starting point due to its excellent performance. Although the specifications seem modest, give it a chance, you won’t be disappointed. Microsoft offers out of the box reports which can provide great insights which help to monitor usage and performance, ensuring the available Cloud PC meets the user their needs. As a last one, during trials or a proof-of-concept, daily usage is essential or you will not be able to view the recommendation report.
Leave a Reply