Copilot+ PCs are currently seeing strong adoption. They use built-in NPUs to accelerate AI workloads and bring powerful on-device AI to Windows. These features are very powerful and allow you to search for a subject or object in for example, a picture. Let me show you what you can do to improve the user experience for these features even more. The keyword here is Thumbnails.
AI Enabled or Copilot+ features
Copilot+ has clearly become one of the directions Microsoft is taking with the Windows Operating System. It is therefore no surprise that these AI features are now making their way to Windows 365 Cloud PCs as well.
If you want to learn more about about these features there are some good blogs about this topic from my good friends Dominiek and Aresh:
- Exploring AI features on Windows 11 Copilot+ PCs and Windows 365 AI-enabled Cloud PCs
- AI-Enabled Windows 365 Cloud PCs – Full Automation with PowerShell (Graph REST API – Part 1)
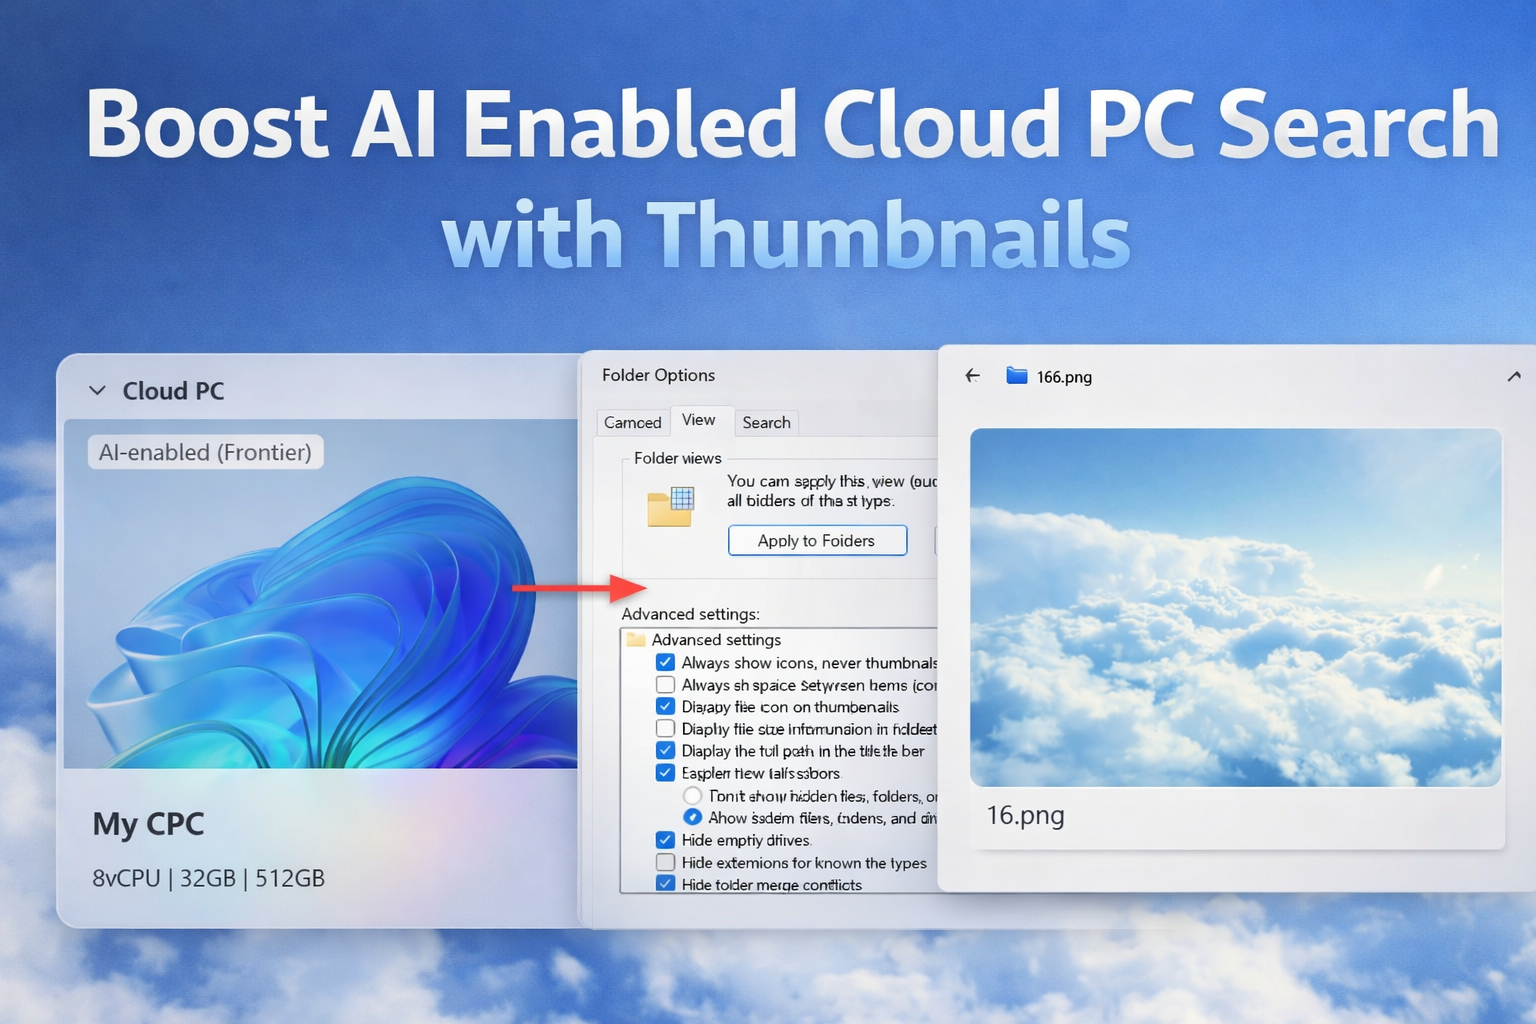
After enabling the feature, the Cloud PC is labeled as “AI-enabled”, confirming that all Copilot+ capabilities are active. You can now start using advanced features such as Click to Do, Semantic Search, Federated Search, and more.

Semantic Search
One of my favorite features is semantic search. It allows you to find content based on meaning, not just file names. For example, you can search for specific subjects or objects within documents or images. Instead of relying on how a file is named, it understands what is actually inside the content and returns relevant results.
The problem with Semantic Search on Cloud PCs
For example, I know I have a wallpaper of clouds on my Cloud PC. When I search for “clouds,” Semantic Search helps finding the correct file, even if the filename does not reflect it. Notice the magnifying glass with sparkles, which indicates that Semantic Search is active.

You can see that the search returns many results for my query, but I still need to open each file individually to find the one I am looking for.

Enable thumbnails!
You can easily solve this by enabling thumbnails in Explorer. On physical Windows machines, thumbnails are typically enabled by default, but in remote desktop environments they are often disabled as they prioritize performance over visuals.
You can toggle this behavior in Folder Options within Explorer, under the View tab. Look for the setting “Always show icons, never thumbnails”. This option is enabled by default on most Cloud PCs and Azure Virtual Desktop hosts, which prevents thumbnails from being displayed. Let’s disable (uncheck) it.

Once you opened the folder options, navigate to the View tab to change the setting.

When I now search for the same cloud image, I can easily identify the correct file based on its thumbnail.

I have now identified the image I was looking for, which is named “16.png“.
| You can even further improve the experience by increasing the thumbnail size. |
The image:

Manage this setting centrally
If you only need this for a single user, you can simply ask them to enable the setting themselves. However, if you want to apply it across a fleet of Cloud PCs, you will need to use Intune to manage it centrally.
Through Settings Catalog
There is a setting in the Intune Settings Catalog that should allow you to configure this for all users at once. However, I had no luck with it, as it did not work on my Cloud PC. It might work on a physical device, but I have not tested that scenario.

Through Remediation Script
The approach I used was a remediation script. It checks for the correct registry key and ensures the setting is disabled, as shown in the screenshots earlier on this page. It verifies the value of “IconsOnly” found at “HKCU:\Software\Microsoft\Windows\CurrentVersion\Explorer\Advanced”
You can use the detection and remediation scripts below to centrally manage this setting across your Cloud PCs.
Detection.ps1
# Detection script for Intune Remediation$RegPath = "HKCU:\Software\Microsoft\Windows\CurrentVersion\Explorer\Advanced"$RegName = "IconsOnly"$DesiredValue = 0try { if (Test-Path $RegPath) { $currentValue = (Get-ItemProperty -Path $RegPath -Name $RegName -ErrorAction SilentlyContinue).$RegName if ($currentValue -eq $DesiredValue) { Exit 0 # Compliant } else { Exit 1 # Exists but wrong value } } else { Exit 1 # Key doesn’t exist }} catch { Exit 1}Remediation.ps1
# Remediation script for Intune Remediation$RegPath = "HKCU:\Software\Microsoft\Windows\CurrentVersion\Explorer\Advanced"$RegName = "IconsOnly"$DesiredValue = 0# Ensure the path existsif (-not (Test-Path $RegPath)) { New-Item -Path $RegPath -Force | Out-Null}# Create or update the registry valueNew-ItemProperty -Path $RegPath -Name $RegName -Value $DesiredValue -PropertyType DWord -Force | Out-Null#restart explorer to apply changes, winwdows will auto restart itStop-Process -Name explorer -ForceWrapping up
I hope this article helps you to improve the user experience on AI enabled Cloud PCs. This is one of those silly settings that are easy to overlook but have a positive impact on the overall user experience. It’s therefore important to enable it proactively for your users. That said, do you think Microsoft should enable thumbnails by default?
Leave a Reply